Speed up Java development with an on-site proxy Maven repository.
Out of the box, modern Java development can be pretty resource intenstive. On a typical Java development project, I may have to download gigabytes worth of dependencies, source packages, javadocs, and the Eclipse IDE on top in order to just get started. Multiply that by the number of developers you have on your project and add a CI server building and rebuilding the package everytime you push an update, and you've got some real time and bandwidth getting eaten as you develop. Similar to how you can cache dependencies for OSGi bundles with a repsotory manager on your local network, you can use Nexus 3 to set up a Maven repository proxy. Set up correctly, your development machine will check against your local Maven repository to satisfy your build dependencies before reaching out to the internet. Better yet, this local cache will automatically grow to match the dependencies you're attempting to include-you won't need to manually specify what packages you want to save, only the remote repositories that you should potentially proxy.
I'm assuming you have a working knowledge of Docker. A Docker image will be provided for you, but I'm counting on you to know how to deploy it to your server, and how to run it. I'll also be showing you how to let Maven know about the proxy server, but I'll also assume you have a Maven project to build. After all, why would you care about speeding up your Maven builds, if you're not using Maven already?
Setting up Nexus 3
We're going to use Nexus 3 as our proxy, happily the community version of Nexus 3 supports Maven proxy repositories out of the box. Even better, Sonatype keeps a Dockerfile maintained for Nexus3, so we don't have to write one. I've provided a Docker Compose file to match my personal perferences. Get it up and running on your local server. If you're using the provided docker compose file, the Nexus UI will become available on port 8084. You'll also have to give it a little time after starting the container before the UI will actually become available.
Configuring Nexus 3 Proxies
You'll have to sign in before you can do anything further, the default username and password are admin/admin123. This would be a great opportunity to set a new admin password. Once you've logged in, a gear symbol will become available at the top toolbar. Select it, and then select the Repository->Repositories section on the left toolbar.
The default maven-central proxy repository
The default installation of Nexus 3 comes with a number of built-in repositories:
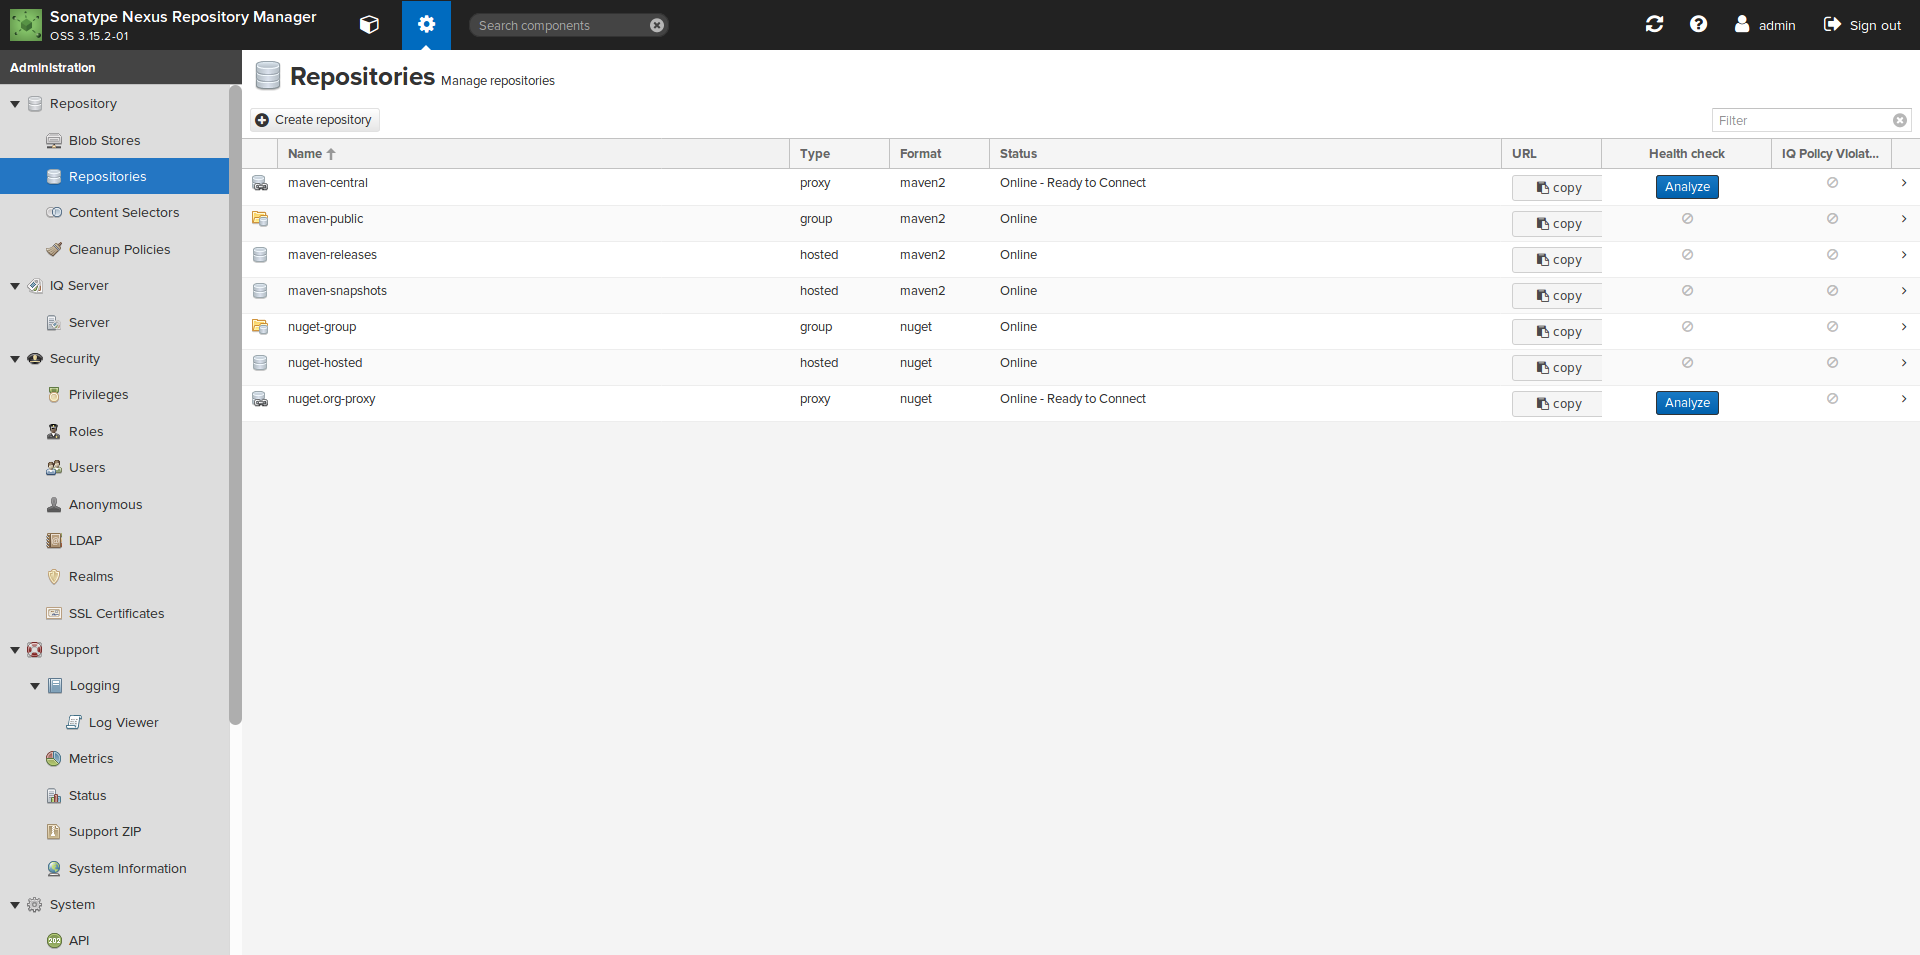
Lucky for us, it looks like one of the default repositories is a proxy for maven central. Click on it to take a closer look:
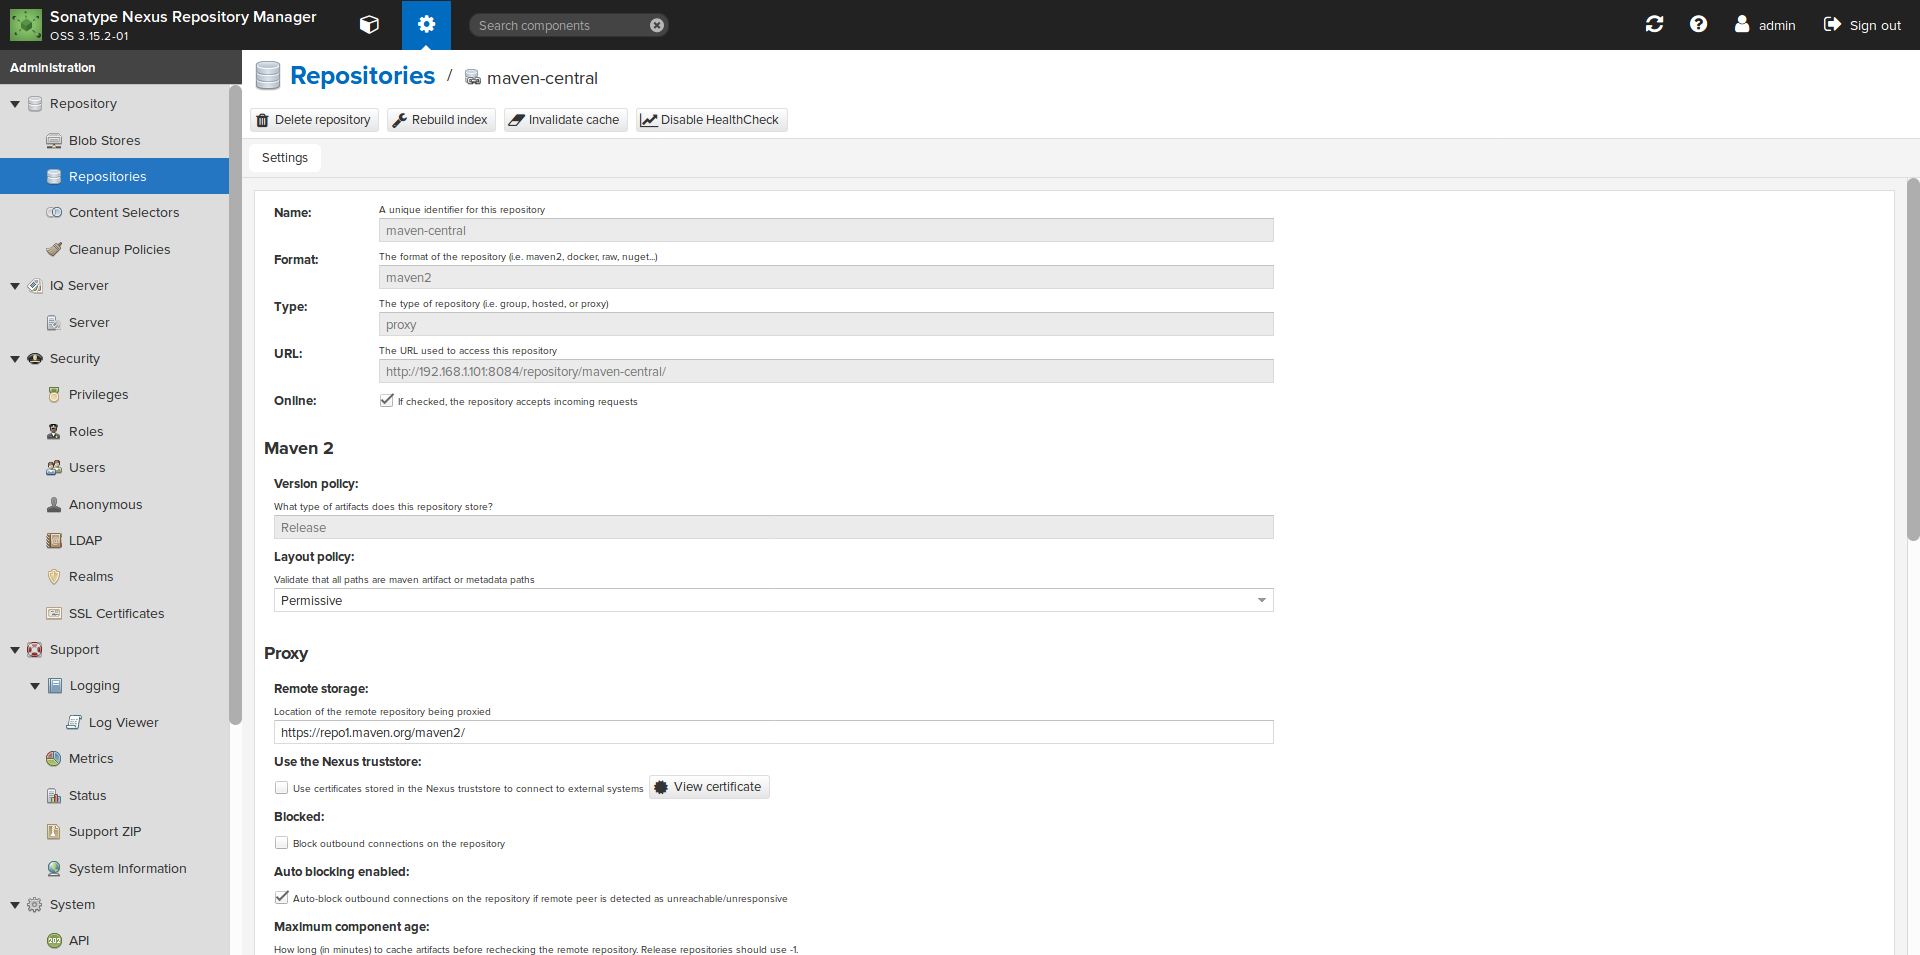
This tells us all of the settings we'll need to make other proxies.
Make a jcenter proxy repository
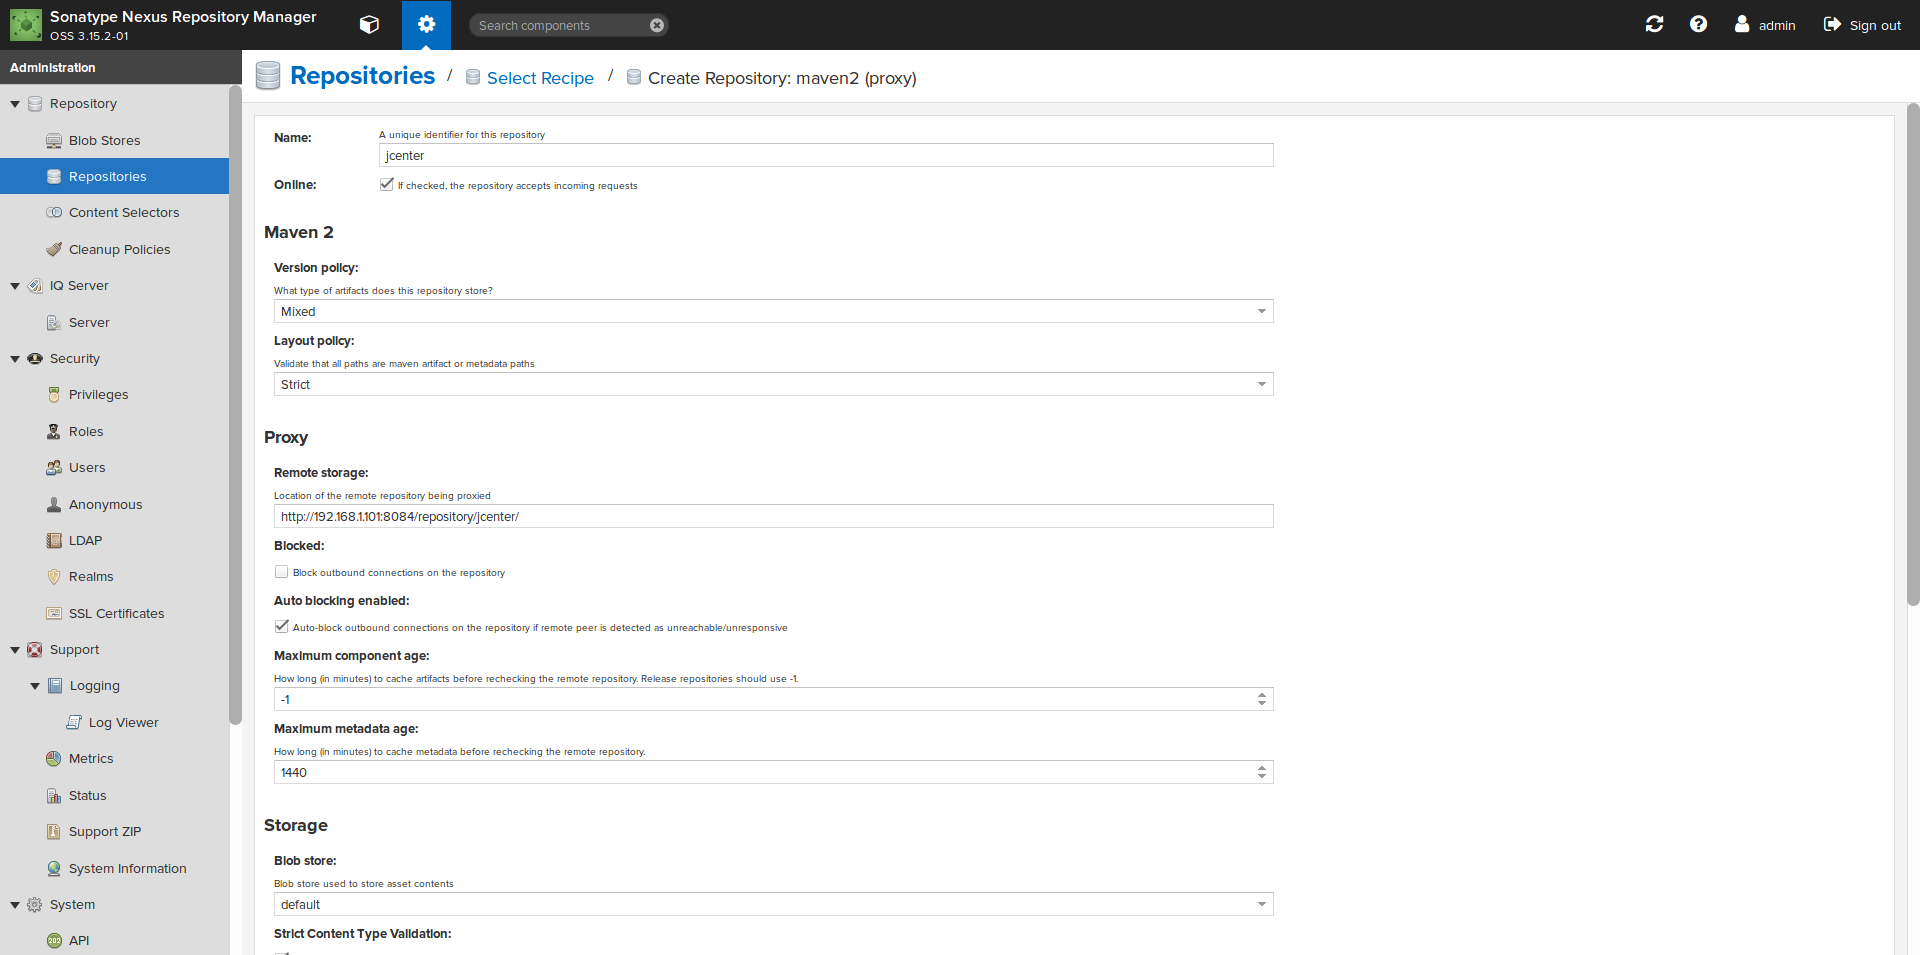
Return to the repositories page, and choose the "Create Repository" button on top. When presented with the list of repository recipes, choose "maven2 (proxy)".
You'll be presented with a new page, similar to the maven central configuration page we saw earlier. You'll need to consider these fields:
- Name: set this to a unique ID, I just name mine to match the name of the remote maven proxy. We'll just call it jcenter.
- URL: Just to make it easy to track, match this URL against the Name. In this case, we'll set it to http://<server_ip_address>:8084/repository/jcenter/
- Maven 2->What type of artifacts does this repository store? Maven repositories can store release artifacts, snapshot artifacts, or mixed (both release and shapshot). To the best of my knowledge, there's no reason to not choose mixed, so go with that.
- Proxy->Remote Storage. This will have to match the location of the remote repository. You can figure this out by looking at your maven build logs, but for jcenter you'll want https://jcenter.bintray.com/
That's it! Press Save and this proxy is ready to go. If you're following along, your page will look like this:
By the way, the default maven central repository is set to only proxy Release packages, if you want to also support snapshot packages you'll have to delete and remake the repository with the updated settings.
Configuring Maven to reference your proxies
With Nexus 3 ready to go, all that's left is to let Maven know about it. You'll typically want to edit Maven's settings.xml file to accomplish this. settings.xml is typically located at ~/.m2/settings.xml, it may or may not already exist on your development system. In order to let maven know your proxied repositories, you simply add an entry like this:
<mirrors>
  <mirror>
    <id>maven-central</id>
    <name>maven-central</name>
    <url>http://192.168.1.101:8084/repository/maven-central/</url>
    <mirrorOf>central</mirrorOf>
  </mirror>
  <mirror>
    <id>jcenter-mirror</id>
    <name>jcenter-mirror</name>
    <url>http://192.168.1.101:8084/repository/jcenter/</url>
    <mirrorOf>jcenter</mirrorOf>
  </mirror>
</mirrors>
This assumes your Nexus 3 instance is available at 192.168.1.101, port 8084. It's also assumes in your project's pom or targetfile you have a reference to the mirrored repositories marked with IDs "central" and "jcenter". Maven isn't smart enough to check mirrors by url or content, it's relying on you to correctly match up
How do I know it's working?
This is easy:mvn clean install
If you have everyting configured correctly, you can watch dependency bundle downloads in the build log, and you'll see them coming from your mirror's local IP address instead of the remote repository.
That's about it-Nexus 3 does a lot of the lifting for you, so this isn't too hard to set up. Good luck have fun.
